Image Straightening and Cropping!

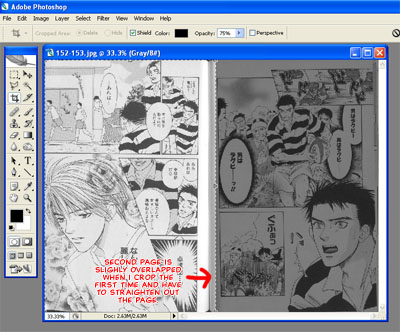
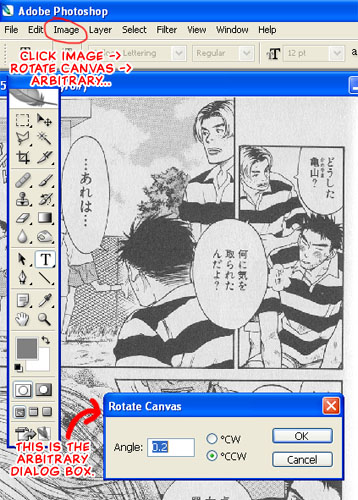
It can be difficult to scan a page and have it be completely straight. So this is something as editors we need to fix at times.


First thing you need to do is separate the pages if you have two pages on one scan. I always give a little overlap into the other page when I know I have to straighten the page.

Using the crop tool (C) just select the areas that you want to have cropped and hit enter. The section that looks shaded is the part that is going to be cropped out.

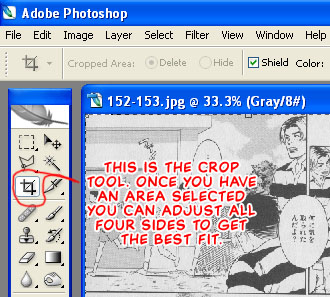
Once you have the selection around the area you want to crop you can adjust each side of the image until you have exactly what you want in the area to be cropped. Once you are ready just hit the enter key and it will do the crop for you.

To open the arbitrary dialog box click image -> rotate canvas -> arbitrary...

I have this set up as an action since I use it often. More on how to make and use actions later.

When we adjust you can do it either clockwise (CW) or counter clockwise (CCW). In this case I need to go CCW. It is best to only adjust by 0.2 at a time. Unless the scan is very off you will only need to do this between one and four times per page. This page took 4 turns at 0.2 to become straight.

Now that you have straightened the page you have blank white space where the page was turned. So just use the crop tool again to make a nice rectangular page. Do your best to not cut off to much of the detail...

Sometimes I opt to crop a little wider and redraw or clone out to the edge depending on what I might end up losing in the crop.

Here is the straightened and cropped page.


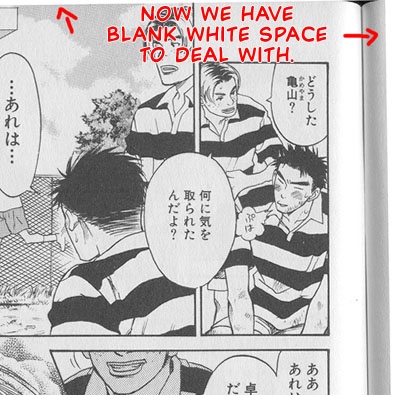
Now we move onto leveling.

Or return to the index page

1