|
| Making shots with Canon remote
control program. |
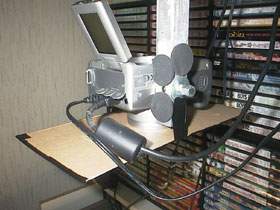
First the software that is bundled with Canon PowerShot
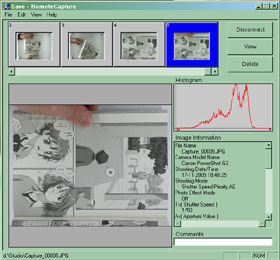
G3. One of them is RemoteCapture.
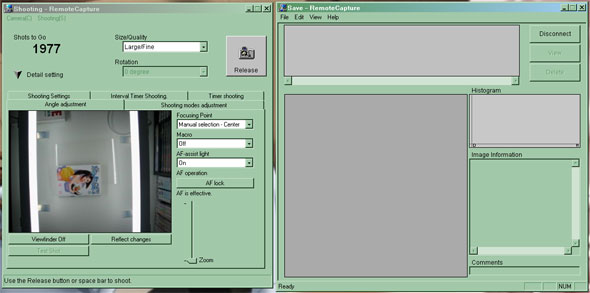
It's the standard tool by most Canon cameras.
First we must see something on the monitor of the camera.
That helps with moving pages until it's straight and centered
in the camera lens.
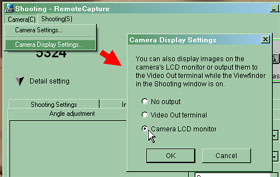
Camera (C) > Camera Display Settings... > select Camera
LCD monitor.
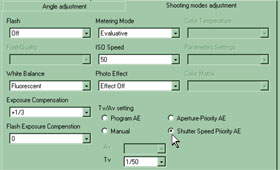
Now the shooting mode must also be configured.
Flash must Off. Whitebalance is set to Fluorescent because
the use of the lights. ISO Speed must at 50, to keep noise
low and image quality high. The Tv/Av setting is at Shutter
Speed Priority AE, and the Tv is set at 1/50 sec. 1/50 sec
is lowest and safest speed to prevent blurring image if you
shake manga page a little.
Then the Exposure. I have it set at +1/3 because the manga
is a little dark. A bit more brightness is added to the photo.
No Photo Effect needed, and Metering mode is Evaluative.
That should to the work. You may set for yourself the good
directory to store images in another window Save. I store
it in D:/Studio/ :-)
Now we are back to first tab Angle Adjustment.
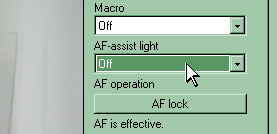
First the AF-assist light is Off, because there is enough
light and useless: it's blocked by black board below the camera.
Marco can be set on Off, if the picture is sharp enough. Set
it on On, when your camera cannot make the image sharp enough.
In my way, the camera lens is more than 50 cm away from the
table surface. That doesn't need really Macro mode.
And yes, don't forget the photo size/quality. It's set on
highest Large/Fine setting. That is good enough for the quality.
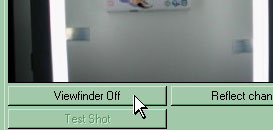
Finally, we can turn the camera preview on: press on Viewfinder
On.
You see the table surface and lights now on the camera monitor
and on the computer screen.
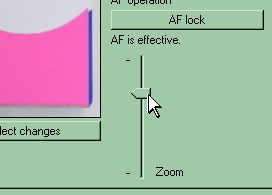

Move now the zoom level until the whole page is almost filled
the LCD monitor.
Click at once on AF Lock button to brighten and sharpen the
preview in the monitor. You may keep AF locked for high speed,
but i choose for safetly purpose unlocked. Because the thickness
of manga is not same at both page sides.
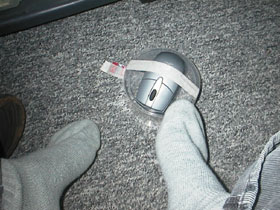
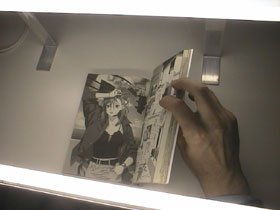
Because you have already use both hands for holding both pages
of the manga, how can you press the shutter of the camera
remotely? There is one solution: with your feet and a wireless
mouse.
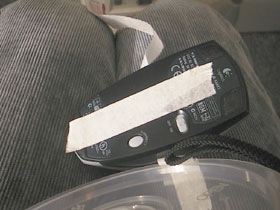
You must place a piece of tape over the sensor of the mouse,
so the mouse pointer doesn't moving away accidentially if
you press the left button. The pointer must keep above the
Release button of the Remote Capture program.

After releasing the shutter, you keep the page unmoved until
you hear second click of the camera. If you can see the image
is transferring to the computer, you can now go to the next
image. Wait until the preview image on the monitor is back
again.
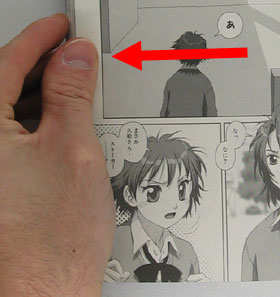
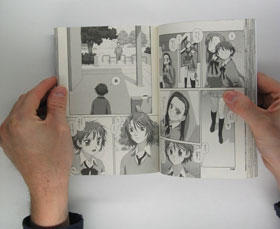
Move the next page until it's good centered in the camera
lens. Check the plexiglass if it's good placed against the
fold area and flat enough. Press again on the left button
of the mouse for next shot.
You see, once you do it, it goes now little faster if you
know how it works. It's now more easier than scanner work.
You don't need to undebound the manga!
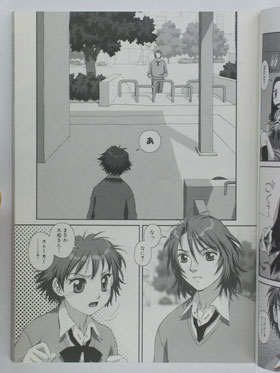
After many shots, i have the files now for example (Capture_xxxxx.JPG):
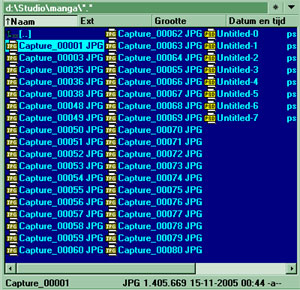
We can now start with editing the photos!
Next tutorial!
|
|
|

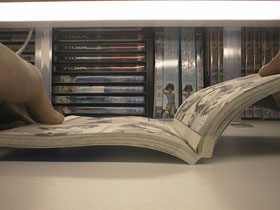
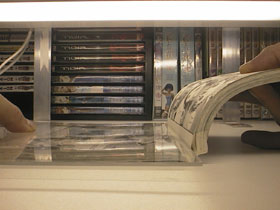
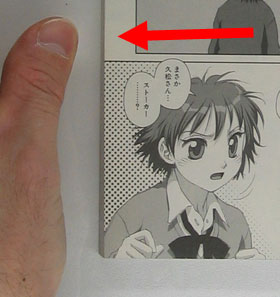
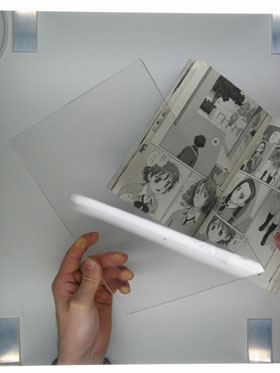 The
only solution to remove curved side is the use of plexiglass
(you can also use real glass plate, but it's sharp and little
dangerous, and can break by pressing too much).
The
only solution to remove curved side is the use of plexiglass
(you can also use real glass plate, but it's sharp and little
dangerous, and can break by pressing too much).