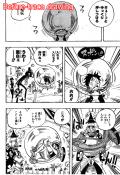
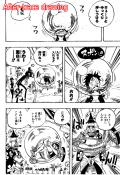
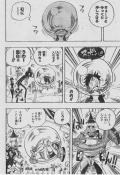
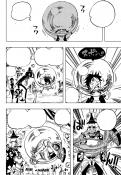
rEaL0sT’s Tutorial for High Quality Manga Cleaning
wewt wewt
Contract info:
e-mail : [email protected]
Franky House Forums: http://www.franky-house.com/forums/member.php?u=11
AIM: reaL0st
mIRC name: real0st
(yeah
I’m so original in my choice of online names)
Version History
September 29-30, 2007
Guide first made
November 11, 2007
Added Step 06.1
Edited pictures
Added stuff to step 9
November 12, 2007
Added redrawing
Moved pictures around so they occupy less space
January 12 - 14, 2008
Redid the whole damn thing ‘cuz I felt like it okay XP
April 21, 2008
Redid some stuff, this is for people who know cleaning
already.
The basis of this tutorial mainly came from the following
tutorials
http://unblessed.net/guide/main.html
http://mangahelpers.com/forums/showpost.php?p=29248&postcount=1
http://mangahelpers.com/forums/showpost.php?p=228347&postcount=1
This tutorial is how to teach the INTERMEDIATE of cleaning
to produce high quality manga scans.
Tips:
~If you do not enjoy doing this, then don’t. You
can always do speed scans. I have nothing against it (other than the fact that
there are so many out there quality scans make up like 5% of the scanlations
out there.
~Have music on. Makes things go by.
~Take a break once in a while. You may get stressed from doing
quality cleans
~Layers are your friends. They are like the bookmarks you
stick inside the book you read. You can go back and fix it without ruining the
rest of it.
~You do NOT have to follow my instructions exactly. This is
a guide, not a demand.
~Don’t go starting $#!* with people over this kinda
stuff. This is an online community. The manga world is to share thoughts,
ideas, and opinions of Japanese comic books. Although technically what we are
doing can be considered stealing, and I’m against stealing..well…can’t stop it so yeah…
Table of Contents
-Step 01 Leveling
-Step 02 Denoise
-Step 03 Auto-trade (not implemented yet)
-Step 04 Graying
-Step 05 Redrawing
-Step 06 SFX
-Step 07 Borders
-Step 08 Final Save
-Step 01 Leveling
First, makes sure the raw is at it’s
original size. If you have a slow computer, you can resize it smaller, but only
to a height of 2500px. Any smaller and it may mess up stuff especially in
redrawing.
First duplicate the page (Ctrl+J). Then
Image> Mode > Grayscale it. Don’t flatten it.
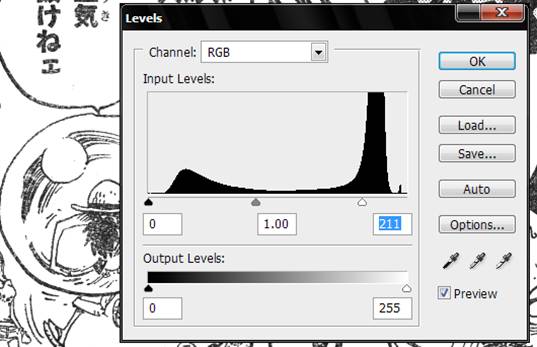
Level by pulling the white slider a
little bit past the first peak so most of the whites turn white. Then drag the gray slider right to
where it starts to rise up. Click in the middle of the graph to make a line
appear and use that as a guide.
-Step 02 De-noise
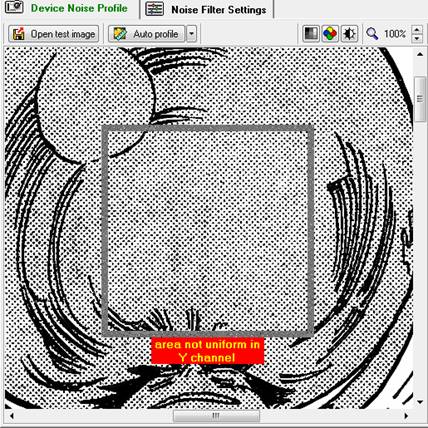
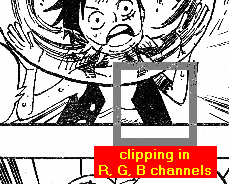 Provided that you have NeatImage, load it up. Then
autoprofile it. If you are a beginner at NeatImage, simple drag and make
a square that contains an area of solid black on white. Example
shown on the left.
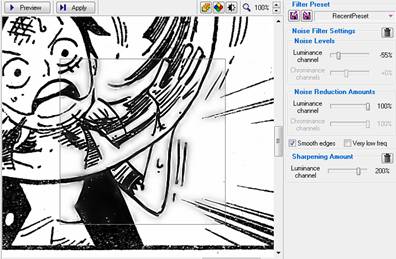
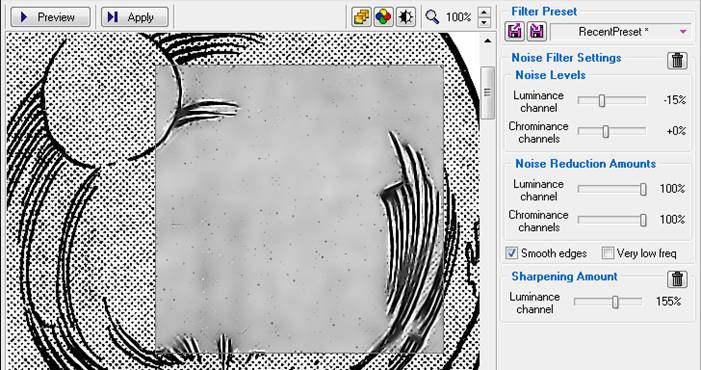
Now these are my settings. But they can vary. Play around
with it until you get something similar to this. You want something where
outside the black lines and stuff there are black smudges surrounding it. But
you don’t want them to be too dark. Then click apply.
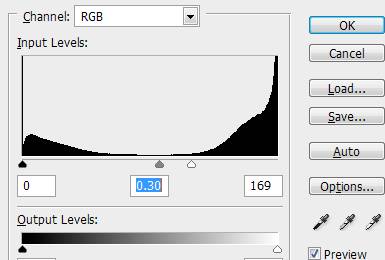
After you apply, level it again, white slider roughly down
before the graph start to become flat, and the gray slider roughly about to the
middle
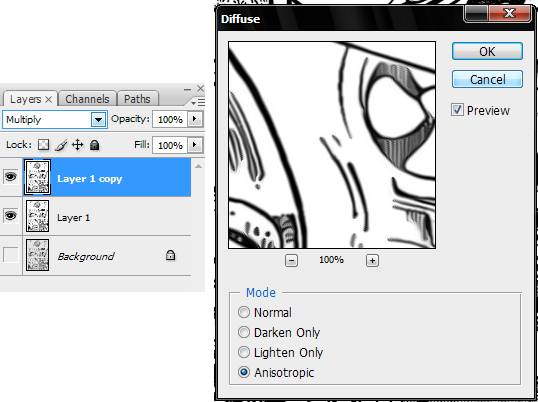
Now duplicate this layer (Ctrl+J)
and change the blend settings to
overlay. Then Apply Filter>
Stylizer>Diffuse>Anisotropic to this copied layer. Then adjust the
opacity of this layer to ~30-40%. Then merge the two layers (CTRL+E)
Now you’ll have to use the burn tool (O) but in the
next step after this (to be added someday) you won’t need to burn. But
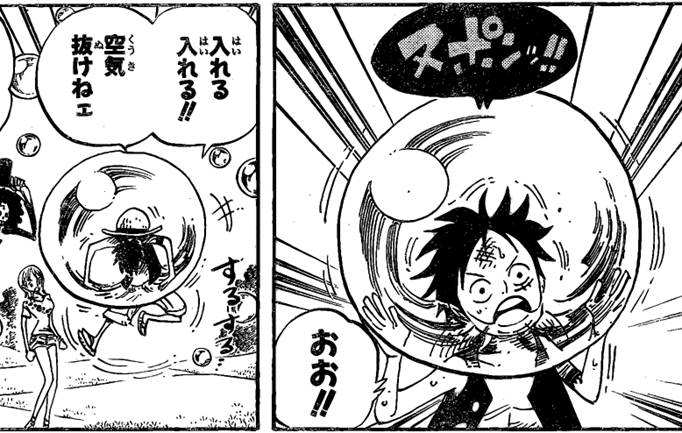
for now, let’s make the blacks black and such. The result below is what I
get before burning. Let’s
name this layer “Original”
-Step 03 Auto-trace
TO BE ADDED SOMEDAY UNTIL I FEEL LIKE
WRITING THIS PART. OTHERWISE YOU CAN SAY THIS STEP IS SKIPPED. BUT ONCE THIS
STEP IS COMPLETE YOU WILL ACHIEVE A RESULT LIKE SO:
(pictures are clickable
links)
-Step 04 Graying
Now this part is fairly simple,
but most time consuming and requires precision. For now we’ll use a
different method of filling in grays without using auto-trace method. First
duplicate your main layer (the layer that was just merged. Then open up neat
image. Then auto-profile the part you know is suppose
to be gray. The bigger the area you select the better.
After that, go preview your grayed
out area and adjust the settings until most of those dots are blended in and
blurred out.
(see below)
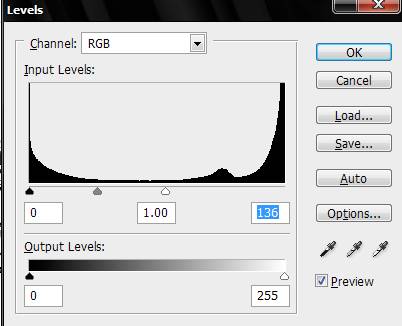
Now we’ll just level this layer.
BUT ONLY LEVEL WHITES.
Meaning only move the white
slider like so.
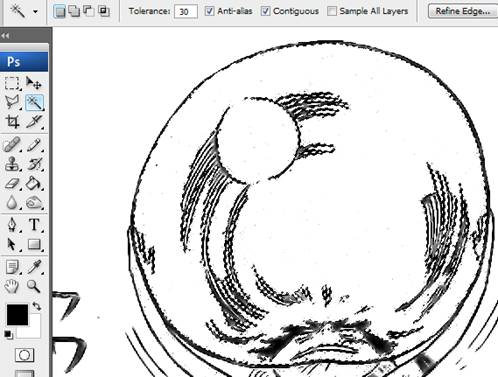
Now grab your Wand Tool (W) and set the tolerance to 30-40.
Then click the white area that use to be gray. Do this
with as much gray as you can. Now create a new layer (Ctrl+Shift+N) and name it
“Gray” or whatever you want, as long as you know it’s the
gray layer.
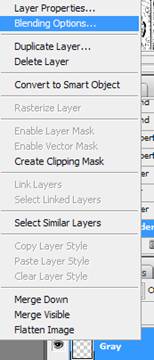
Right click this gray layer and click blending options.
Then tick “Pattern Overlay” and select the gray
pattern that you should already have. Ask me for it if you don’t have it
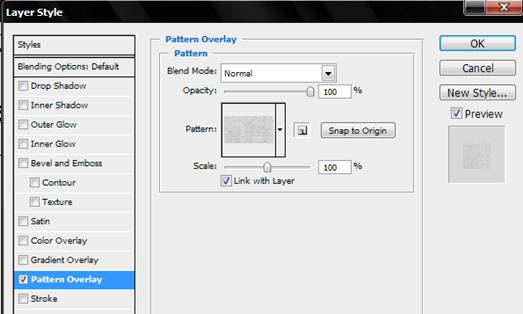
 Now select your gray layer with your
used-to-be-gray-layer still selected by the pen tool and fill that area with
the paint bucket tool (it doesn’t matter what color)
Now
everything should be grayed out! But wait! There are small little details that
are still not grayed out. Don’t worry, there are
two ways to fix this
1) Use the
wand tool (W) again and select those small areas
2) Use the
brush tool (B) and draw in those grays. Yes now you can draw in grays with the
brush tool (as long as the selected layer is the gray layer)
3) Use the
Polygonal tool (regular or magnetic) or Pen Tool (P). All three of these work
the same. Polygonal uses anchor points you want, magnetic makes anchor points
based on where you position your mouse (I find this to be the best incredibly
easy once you master this tool) and Pen Tool, a favorite of mine combines both.
You choose the anchor points and you can adjust the curve much easier. For
graying, I’d use magnetic polygonal tool.
Try to get
as much of the gray layer filled in. Don’t worry if it looks too ugly
when zoomed in, as long as when you zoom out to 50% and it looks somewhat good
it’s ok. When you resize the details will be all right.
After you
fill in all the grays delete the layer that was created and modified by neat
image.
-Step 05 Redrawing
Redrawing is incredibly simple, but time consuming. I
go about three
ways of going through this
First off create a new layer. We’ll call this layer
“Lines”
1) Pen tool :Faded line effect.
Get these
settings:

I primarily use Pen Tool for two things: connecting broken
curved lines and faded line effect. Play around with pen tool, as I will not
explain connecting broken lines, it’s easy. I will explain how to do the
faded line effect
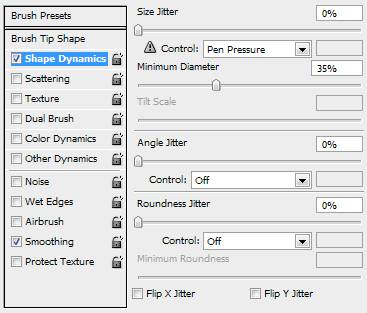
First select the px size of brush
you are going to use. Then open up the Brushes window (At the Menu Bar:
Window>Brushes). Then have these settings
Next Using the pen tool draw your line, then right
click>Stroke Path and check of “Stimulate Pressure”

Now because I’m lazy and this page doesn’t look
to have a need for this faded stroke look, I’ll just do a quick example.
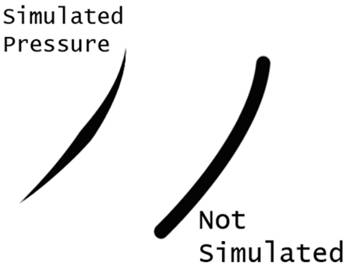
As you can see, the simulated pressure line looks more
sleek, and can have (at certain times) more uses than the standard brush.
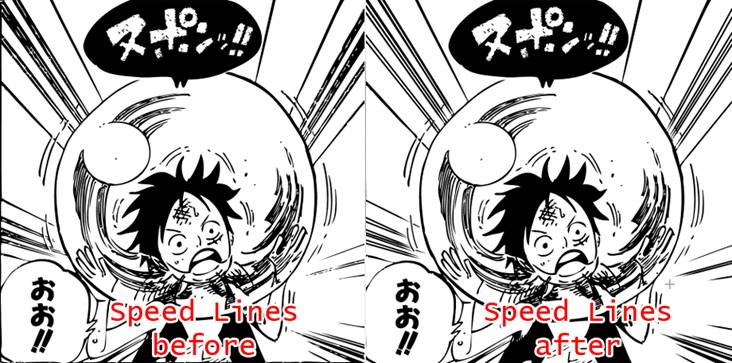
2) Line Tool: Speed Lines using Line Tool (U)
Speed
Lines are a pain. You know that. But finding this method cut my line drawing in
half.

**Note* the px size will vary depending on the line.**
Now have your Line Tool (U) to these settings and find your
speedlines!
*Note* When using these settings you also change the Pen
Tool Settings Too!!! So if you are switching between Pen Tool and Line Tool
REMEMBER TO SWITCH SETTINGS
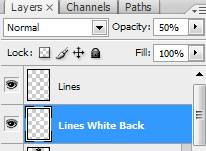
Now find your speed lines. Create a new layer “Lines
White Back”) is what I would call it I guess. Anyways put this layer
behind the “Lines” layer. Then select the area behind the speed
lines you are going to draw over and fill that area with white. Then set this
layer’s transparency to 50%
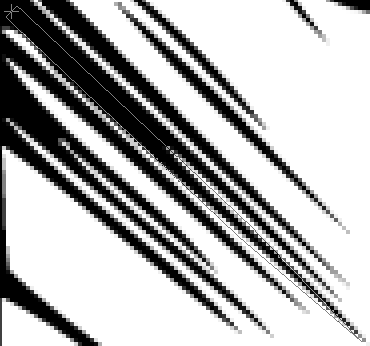
Then click where the pointed tip of the speed line starts.
Then drag to the end of the speed line. After you did this to all the lines,
make the Lines White Back opacity to 100%
3) Brush tool……the easiest damn method to drawing
there is. You just set your brush px size, click and
hold at the beginning point of the line, hold shift and click the end of the
lines. It’s that simple. But it’s very effective on speed lines
that aren’t pointed like the one above.
-Step 06 SFX
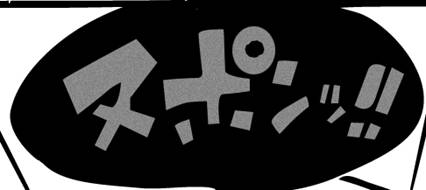 For SFX I’m going to use the layer with
the original after it was leveled then neat imaged ONCE. Create a new layer
called “SFX”. Hide all layers except for SFX and the Original
Layer. Grab your either Polygonal Tool or Pen Tool and on the SFX layer outline
the SFX text. Fill the area you just drew with a gray color. Then go to Menu
Bar>Filter>Noise>Add Noise. Now the only thing you must do is have your %
under 50, and have monochromatic ticked.
Experiment with different shades
of gray and using either Uniform or Gaussian.
-Step 07 Borders
WOOT WOOT ALMOST AT THE END!
Too lazy
so just follow this guy’s tutorial. Plus this is the hardest
one to give a clear image without going over the size of this page so
yeah….
http://mangahelpers.com/forums/showpost.php?p=228347&postcount=1
-Step 08 Final Save
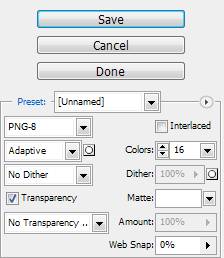 1) One final look. If you missed something go
back to the step that covers it and fixit! Remove any text bubbles and make it
clean so the typesetter can easily type it in.
2) Resize the image to a height of
1100px
3) Look again
4) Ctrl+Alt+S
5) The settings on the left
6) Click save AND YOU ARE DONE
WOW!!!
BEFORE (resized) RESULT
THE END
Will add more to it later…someday
-Special Credits (that I can think of for now)-
Mr. Prince
He started this little group.
Wherever you are, I’m sure everyone, old and new members
thank you.
Venicia777
The one who kept
Franky House alive. Without him this community would not exist..
Yoniekai
Helped teach me and the other
original members of FH learn to clean
Skywalker6705
Another original member, amazing
help
Guerriero
Helped skywalker with some of the
methods of cleaning
Kalendel (http://unblessed.net/guide/main.html)
One of my first cleaning guides, got
me into cleaning manga
shinwei (http://mangahelpers.com/forums/showpost.php?p=29248&postcount=1)
One of my first cleaning guides, got
me into cleaning manga
