Filling in Blacks and Whites
For lack of a better term, I’ll call this category “filling,” since it will cover ways to fill in large areas with a single color. Some groups may call it “inking.”
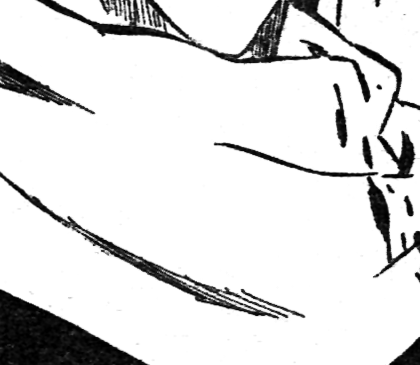
To start, I’ll focus on filling in BLACKS and WHITES.
For this, there are only two rules: Black areas must be filled in completely with black and white areas must be completely with white. Piece of cake, right?
So why do these two rules often get overlooked? I really have no idea. Either there is a speck in the white or there is not. If you zoom into your page and do a really thorough speck check, you won’t have any problems.
There are several different ways to fill in black areas, and this tutorial will use the Polygonal Lasso Tool, though the Pen Tool will work much the same.
BLACKS:
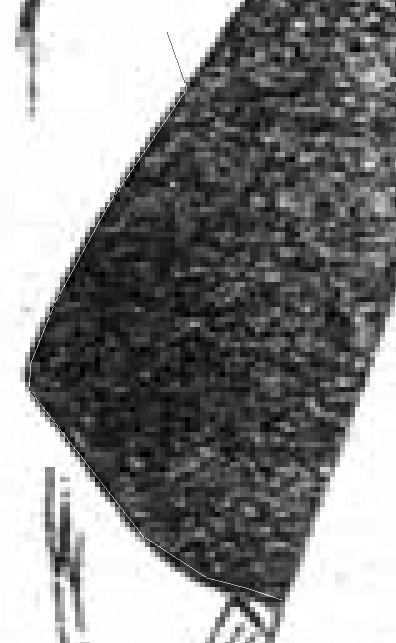
1) Zoom in on the area you want to fill. With the Polygonal Lasso Tool selected, make a series of points along the very edge of the area.
[spoiler]
[/spoiler]
*** If you make a mistake and click somewhere by accident, hit the BACKSPACE key to undo the last point.
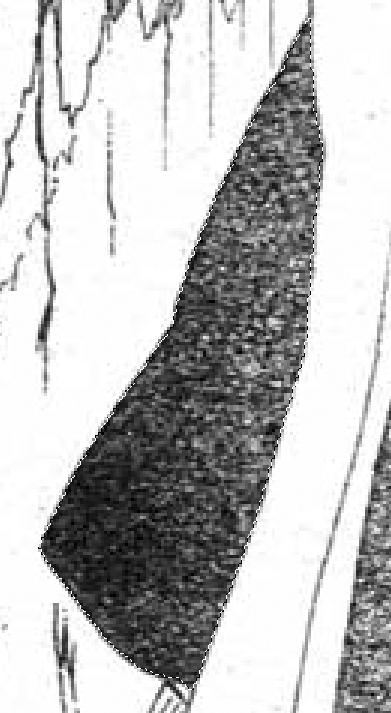
2) When you get back to the beginning of your Lasso path, click on the first point to close the loop. The thin solid line should now become “marching ants,” indicating you’ve selected the area inside your polygon.
[spoiler]
[/spoiler]
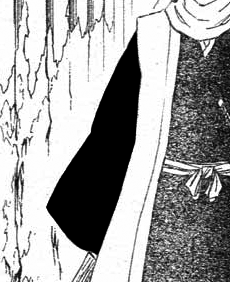
3) Right click and select “Fill” from the menu. Leave the defaults, and just make sure you’re choosing black as your foreground or background color. Click OK, and the area inside your polygon will turn black.
[spoiler]
[/spoiler]
4) Hit CTRL-D (or Command-D for macs) to Deselect and make the marching ants go away. Now do this for the rest of the black areas ^_^
5) For thin areas or oddly-shaped areas, it’s sometimes easier to just use the Brush Tool to ink something by hand. If I’m being particularly picky, I’ll use the Pen Tool, and then Stroke and Fill the pen path to make it perfect.
The bottom line is that whichever method you choose, the entire area must be solid black.
WHITES:
In general, the black areas will always have to be completely inked over. This is due to the aforementioned crappy magazine printing. If you did a good job leveling, however, white areas will be clean except for a few left over specks of gray “dust”. You don’t have to be as careful covering over these specks as you do when inking blacks.
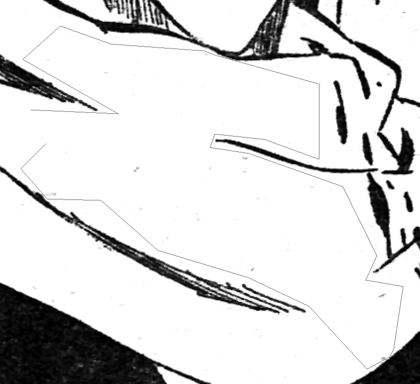
Again, use the Polygonal Lasso Tool to enclose the area that needs to be cleaned up. This time, you don’t have to be so careful getting close to the border. You just have to make sure all the big specks are included.
[spoiler]
[/spoiler]
Then just right click and choose “Fill.”
[spoiler]
[/spoiler]
Again, it doesn’t matter which method you ultimately use for removing specks from white areas, they just have to be removed. Sometimes it’s faster to just use the Brush Tool to manually remove any specks.
—————————–
If you’re cleaning for an HQ group, you’ll probably have to cover over gray areas with a new layer of gray. The Polygonal Lasso Tool is good for filling in those areas as well, though to make it look really nice I use the Pen Tool, Fill with gray, and then Stroke the pen path with black to keep the line art nice and smooth.
I hope there’s another way of inking,
other than using pentool.
The first part of this tutorial uses the polygonal lasso ;)
Though for filling grays, I recommend using the pen because then you can stroke the outside with black for a perfect outline.
Thanks for you tutorials! It’s a great reference. I’m so glad someone took the time to do this.
Glad to hear you found them helpful!
A technique I use (in the GIMP, but you should be able to use it in Photoshop or any similar program) is to use the fill tool set to “fill similar color” and adjust the range up or down so it zaps all or most of the measles without taking out much of the legitimate shading. You can use rectangle, ellipse, or lasso selection to restrict the field to prevent your fill from running over into areas you want to protect. This is a compromise from actually outlining just the area you want to fill. It usually works for me, though I often have to make several re-tries, adjusting the color range up and down (from the exact color I’m filling with)
A really quick-and-dirty cleaning method is simply to posterize the whole page. If there is little or no shading, reducing a grayscan to between 5 and 16 colors will produce a nice-looking picture with enough tones to make the anti-aliasing work. Where it won’t work is with a really bad scan, or with a page with a lot of subtle shading; posterizing will get something that looks like a contour-map–which can be a cool effect, but probably is not what you want for a scanlation.
Hmmm… I have CS, so I don’t have a fill tool, but the next time I’m on CS2 I will definitely take a look at your method. However, if you’re already selecting the area to be modified, and it’s going to be black or white, then can’t you just crank on the levels? I guess the key is making sure your selection is perfect…
For Bleach, we usually save as png with 24 colors, but I worry that some of the other series I work on have too many gray tones.
I don’t think I have a posterize filter, either. I have Posterize Edges – is that what you mean? What settings do you use for it?
Thanks for the tips ;)
I used the same technique to fill the black and white but I got reply that the black parts are jagged, Can anyone help me to solved this problem?
Just sharing my opinion. Umm….between Polygonal Lasso Tool & Pen Tool. It’s better to use pen tool since u can edit or remove it anytime u one. If u use P.Lasso, it’s a bit hard to edit it back after u make mistake & deselect….you have to trace it all over again. Plus Pen tool can trace more nicer rather than P.Lasso. U can try c the diffrent if u try to compare using both tools.
I’m probably too late to help, but make sure that the box at the top of the window for “anti-aliased” is checked (assuming you’re using the poly lasso).
can anyone help me to remove the marching ants in GIMP …ctrl+d dsnt work
do you have a tutorial to clean the font outside the the bubbles? i don’t mean the sfx i mean the character’s thoughts which are written outside the bubbles
ty
There is actually a tool in the palette, Magic Wand Tool, that allows you to select one color automatically. It’s not very neat to use that, but is it okay to use that for filling in the blacks & whites?
Take a look at the tutorial for the Clone Tool. You will have to remove the text outside of the bubbles and redraw any background that it was covering.
Take a look at the tutorial for burning blacks while using the Magic Wand (I think it’s called inking for speedscans or something). Just remember to double check that the wand is selecting the area you want and not some other random area on the page too.