Intro to the Lasso
There are three types of Lassos: Regular, Polygonal, and Magnetic. Personally, I use the Polygonal Lasso the most.
- Lasso lets you select something completely manually. It’s good if you want to copy/paste a single object – just use the Lasso to draw a circle around it.
- Polygonal Lasso uses a series of points to make a polygon around the area you want to select. This is good for when you want to be more precise since you can carefully choose your next point. IF YOU MAKE A MISTAKE AND CLICK WHERE YOU DIDN’T WANT TO, HIT THE BACKSPACE KEY TO UNDO.
- Magnetic Lasso automatically identifies the object or line that you’re trying to select and will “stick” the Lasso path to that object or line. You can undo a point using the Backspace Key here, too. Between us, I can NEVER get it to perfectly select what I want, and I always have to go back and fix things anyway.
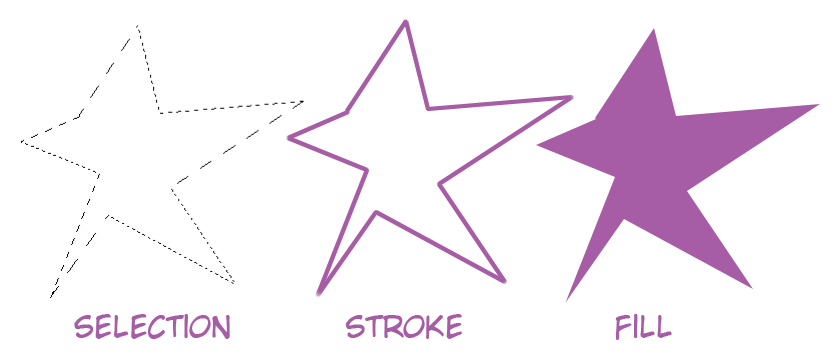
To close your Lasso selection, bring the path back to where you started. The thin gray line now becomes “marching ants” to indicate you’ve made a selection. Now, you can right click to bring up the menu.
For the purposes of this Beginner guide, only focus on “Stroke” and “Fill” for now.
- Stroke creates a line along the selection path. You can decide how wide you want the line to be, and whether you want it to be inside the path, outside the path, or centered directly on the path.
- Fill does just that – it fills the selection with the Foreground Color.
Once you’re done with your selection, hit CTRL-D (Command-D) to Deselect and make the marching ants go away.
As with many Photoshop Tools, holding down the Shift Key will let you make a perfectly horizontal or vertical selection line.
If you want to select everything outside your selection (as opposed to what is enclosed within your selection), hit CTRL-SHIFT-I (Command-SHIFT-I) to switch to the Inverse. Now everything outside the marchings ants is selected, even though the marching ants haven’t changed.
————————————–
*** One thing to keep in mind is that the Lasso Tool has an anti-aliased checkbox. This will affect Stroking or Filling the section. Also, you have to choose anti-aliasing or not before you make your selection. Once you’ve created your selection, toggling the checkbox won’t make a difference.

I find it easiest to always keep the box checked and uncheck it for the few times I don’t want anti-aliasing. Please see the anti-aliasing guide if you need more information.
Thanks, very clear tutorial! :)
The “marching ants” actually do change when you press “Inverse”. You can see them around the whole image now in addition to the original selection, you would not have prior to that.