Precleaning (Diffuse Filter)
This is how M7 recommends precleaning a Bleach raw (usually one of Kylara’s high-res raws). I tried it on a smaller raw (2000 px height) and it came out fine, so this might be a good alternative to Neat Image if you don’t have access to a super-HQ raw.
Thanks to Yumi for the original tutorial.
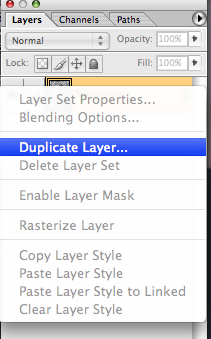
1. Make a copy of the raw background – right click on the Background Layer and choose to duplicate it. Do your leveling on this copy so that you can always go back and try again.
[spoiler]
[/spoiler]
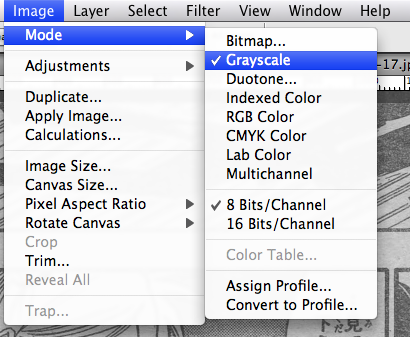
2. Make sure the Mode is set to Grayscale. Go to the Image menu at the top, go to Mode, choose Grayscale.
[spoiler]
[/spoiler]
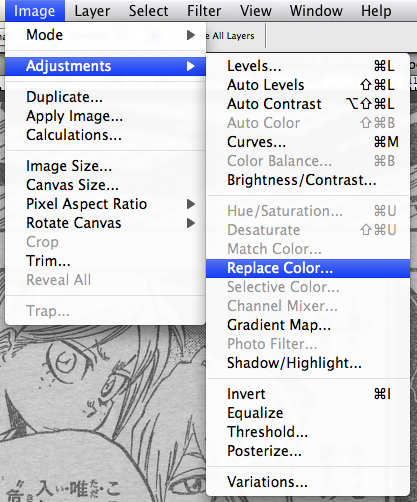
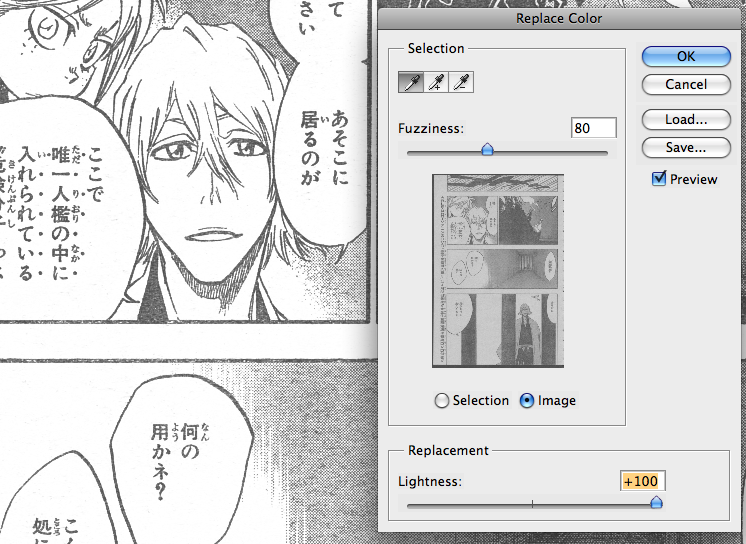
3. From the same Image menu, go Image -> Adjustments -> Replace Color. Set Fuzziness to 80, Lightness to 100 and click the dot-button for Image. Your cursor will now appear as a dropper tool so just click anywhere on the page where it should be white, but isn’t. Click OK. The page should appear very washed out now.
[spoiler]
[/spoiler]
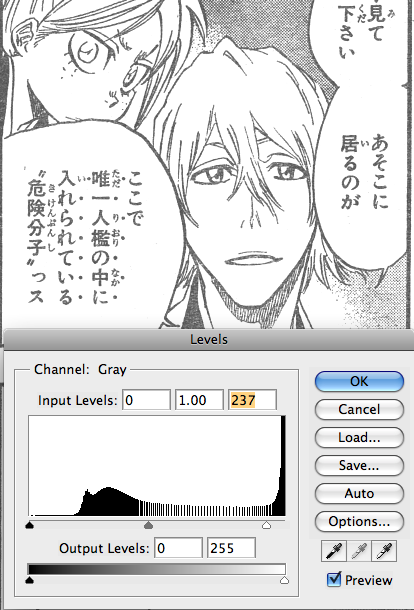
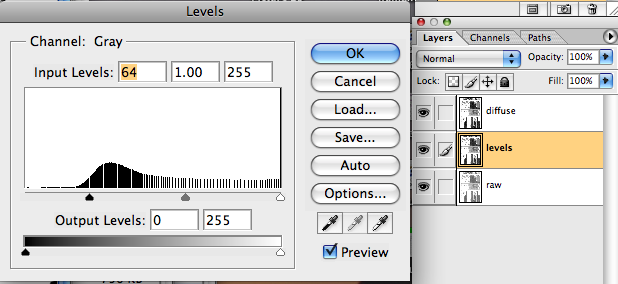
4. Now we level. See the Intro to Leveling tutorial for an explanation of the Level window. Move the white slider to the left of the white peak, but don’t move the black slider yet.
[spoiler]
[/spoiler]
For this method, you can over-level the whites a bit as long as you don’t touch the blacks (so you can move the white slide further to the left than the Intro tells you to). Don’t try to get rid of the darkest specks, though, or you’ll sacrifice the rest of the page for a handful of specks. Those you can remove later.
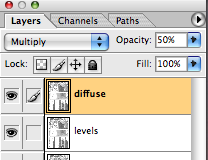
5. Duplicate this leveled layer. Set the copy to 50% opacity and set mode to Multiply (on the Layers window, where it usually says “Normal,” open the drop down menu and choose “Multiply.”)
[spoiler]
[/spoiler]
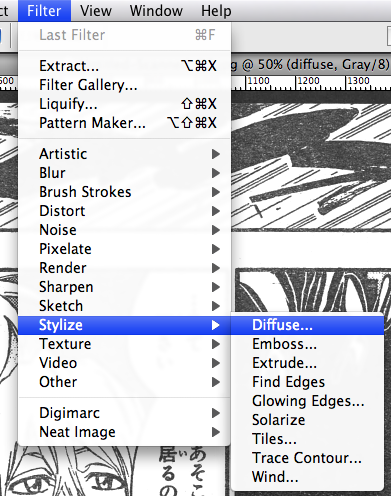
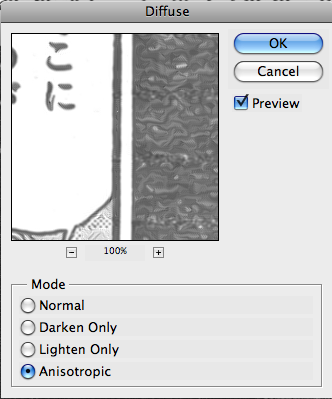
6. Go under Filters -> Stylize -> Diffuse. Choose anisotropic and click ok.
[spoiler]
[/spoiler]
7. Level your blacks now on both the leveled layer and the diffused layer. You can darken the blacks quite a bit now and they’ll look good. (NOTE: Diffuse makes straight lines often look quite squiggly… So be careful with it.) The reason we can get away with over-leveling the whites in step 4 is because we diffuse the blacks to reduce jagged edges. The white slider on the diffuse layer might also need to be tweaked a tiny bit.
[spoiler]
[/spoiler]
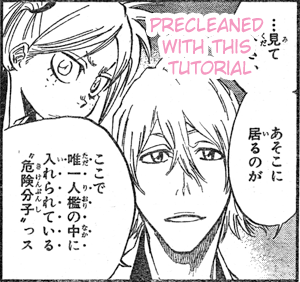
8. Voila! Your page is precleaned!
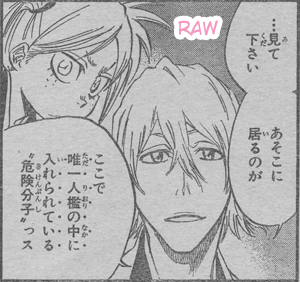
Don’t be afraid to go through this process a couple times and tweak things differently. Sometimes I’ll have a couple layers with different levels, and then I toggle them on and off to decide which I like best.
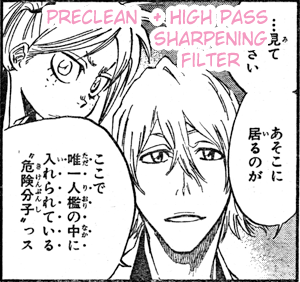
After this, you may want to try using the High Pass Sharpening Filter to make your lines a little darker.
[spoiler]
[/spoiler]
This guide is very useful. The use of multiple layers to stack the effects without touching the original shows very smart photoshop skills.
Yet there are some things not covered in this guide, such as mistakes made by the RAW provider… dark borders/corners?
Generally speaking, this guide and mainly the whole site focuses on well scanned RAWs. A nice thing to see would be how to clean and restore bad RAWs.
Well, Jump mag scans are arguably impossible to scan well due to their inherent poor quality. I’ve thought about doing a gutter tutorial, but I’m of the opinion that spending hours on redrawing the gutter just isn’t worth it unless there is something absolutely vital to the page being lost. Most distortion in bad raws (gutter, corners, etc) would be redrawn with the Pen Tool or Cloned, both of which are introduced on this site.
As for bad scan lines that run vertically down the page, there’s really not a lot you can do since often those pixels are lost for good. Do you have any examples of bad raws that you need help with?
Can anyone make actions for this?
many thanks for this tutorial, i’ll use it on the Soul Eater MQ raws!
I’ve been meaning to make a tutorial for making actions, but I just haven’t had time lately. It’s pretty simple to do yourself: click on the new action button and then do all the things that you want to record, then hit the stop button. It’s a bit like a video camera ;)
I’m glad you like it!! I think it’s a good alternative to all the over-denoised scans out there ^_^
yes, it is XD
your tutorials are really usefull and easy, now my scans won’t look over-denoised like this http://media4.mangahelpers.com/download/manga-images/deb9e2e721b9d266b014b2b76848ca2e/4b06d619/62599/5/5.png anymore^^
,,i like the way u explain and give an image on it, nice,,
o y one more time, i found (sometimes) there’s not grey but other colour like this one – http://mangahelpers.com/downloads/read-online/64/2 – it’s pink, can i make this image to be black and white? tq,,
@kinyut: you change it’s mode to grayscale, see step 2 ;)
thanks so much, this tutorial is very helpful and save my day ^^ hehe
I can’t get the small raw pic to resemble the precleaned one, it seems like the “multiply” in CS4 darkens the lines somewhat, have a look:
http://i471.photobucket.com/albums/rr77/baskermannen/1-3.png
Any idea how bypass this?
Multiply does darken the layer a bit. It multiplies the pixel values of the top layer (the one with Multiply selected) with the pixel values of the layers under it. We use multiply to help ink the black areas and make them darker without ruining all the line art and the grays. I haven’t looked at that Bleach page in a while, but at first glance, it looks like you’re either leveling your whites too much (making the line art jagged) or you haven’t added your diffuse layer (which makes the line art less jagged).
wow! thanks, it helps me a lot,
Awesome.! great Thanks,it helps me a lot!
Is there a similar filter to diffuse? I would like to get rid of these grids:
http://i.imgur.com/hjlHB.png
Someone in M7 used to have that problem with grays… but it was so long ago that I forget what the problem was :/
Let me ask around…
I can see it on the example in your tutorial too. You can see a little unaffected line at the bottom. It’s just not as obvious.
Some people were asking about a tutorial for poor raws a while ago.
I’d like to contribute an image which I believe is a practically impossible to clean because of low inking quality.
http://www.mediafire.com/imageview.php?quickkey=yxvhjmqoqe5x142&thumb=4
Any suggestions?
Is that the actual size of the page/panel? If you have Neat Image, I would recommend using that to remove the paper texture. Then just level (using replace color), touch up blacks with the burn tool, and start your typeset XD You could kill yourself trying to get this to HQ, or you could do a decent LQ/MQ clean with a really nice typeset.
Also, which version of PS are you using?
Are you referring to the online image or the downloaded image? The original is 2084px wide, I guess I assumed you would download it.
My photoshop version is CS5. I have neatimage but it’s the demo version. I can’t get it to work well, after I neatimage there’s still too much dust remaining, and after I level and resize, the tones aren’t what they should be.
Thanks a lot! This really helps!
hey great tutorial! is this tutorial meant to bypass the need for topaz filters? or can they still be used in conjunction with these steps?
very helpful..maybe ur really an instructor in this..very easy to understand..thumbs up tutorial for novice like me????